


Email forwarding is one of the crucial though not evident features of an online shop. It helps ecommerce businesses better orchestrate the flows of emails from different visitor groups. Customers, in their turn, perceive the shop as a more reliable one when they can choose a particular virtual mailbox. The availability of several addresses makes shoppers think that the merchant has more than one team to manage specific inquiries and takes the matter seriously. At the same time, visitors hint at the nature of their requests just by picking a certain store email address.
Does Shopify provide email?
Though there is no Shopify email hosting, merchants can still create the virtual versions of Shopify email addresses and configure the resending of the store emails to a personal mailbox. This way, you can design as many Shopify business emails as needed.
For example, the tengrwoth.com domain can have the following virtual email addresses:
- [email protected] for vacancies,
- [email protected] for communication with customers, and
- [email protected] for customer issues.
Shopify email forwarding allows merchants to redirect emails from different store visitor groups to one or several personal mailboxes. Below, we explore in detail how the process works.
Before we start, please, answer one question which is critical to configuring these Shopify settings.
Who is the provider of your store domain?
- I have only .myshopify.com domain.
- I bought a Shopify custom domain.
- I have a third-party domain.
- I have a third-party domain, but I transferred it to Shopify.
Now, feel free to go directly to a relevant section to save time—or go on reading and become a Shopify domain email guru.
Shopify email settings with no custom domain at hand
Bad news, Shopify email forwarding won’t work for any .myshopify.com. domain. So, before you think about configuring email settings, purchase a custom domain from Shopify or a third-party provider as we described before.
Shopify email forwarding for Shopify domains
Whether you purchased a domain using the Shopify offering or transferred a custom one to Shopify, it won’t take much time to configure email forwarding. You can do all the tweaks directly in your store admin panel. As there is no email hosting on Shopify, you will have to configure both email forwarding and email replies if you want to access full-fledged email services.
Getting emails from the Shopify store visitors
Let’s learn how to set up email on Shopify step by step.
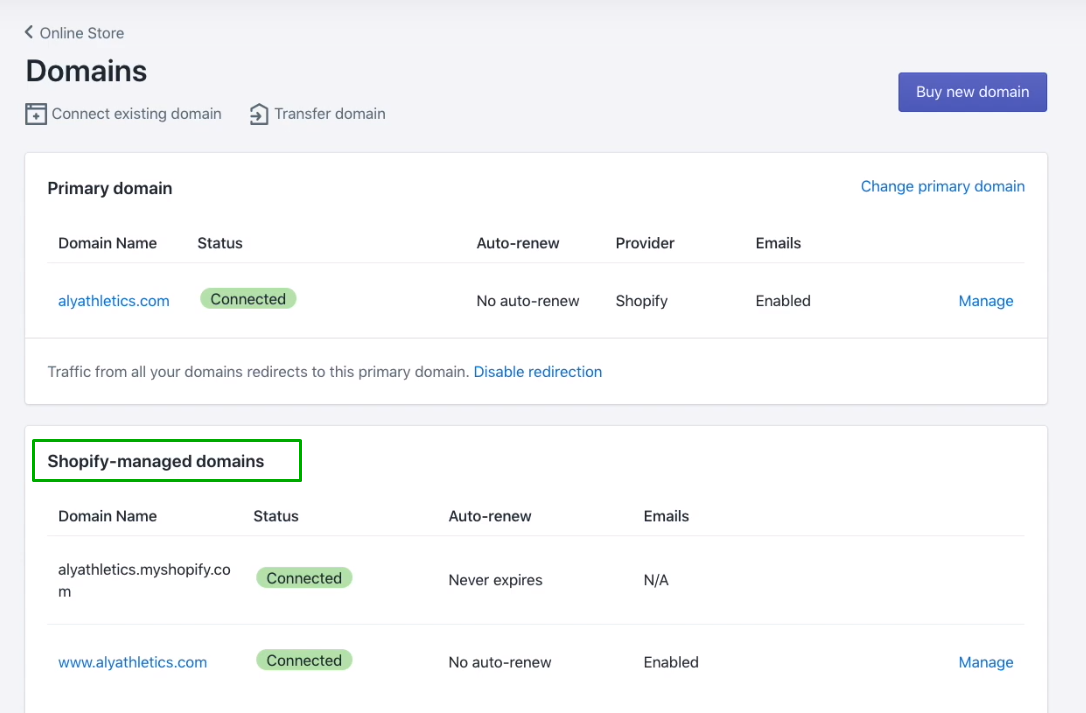
First, go to the Shopify Admin and choose Online Store. Then locate the Domains menu and select the needed domain in the Shopify-managed domains section.
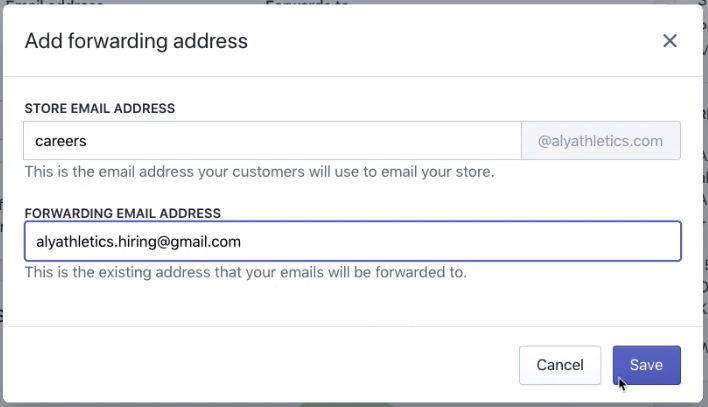
After you click on the domain, you will see the Add forwarding email address button in the domain settings. Click on it and type in your preferred email name in the Store email address field. For example, to get the [email protected] custom email, it is needed to enter just the word support.
The Forwarding email address field is left for your private email box, which can be hosted by Gmail, Yahoo, or another provider. So, in our example, this can be [email protected].
After hitting the Save button, all the messages that customers write to [email protected] will be redirected to [email protected].
By following the above guidelines, you can configure the Shopify email forwarding from several target groups of visitors (virtual mailboxes) to your private address. Just add vacancies, info, support, or whatever you need in the Store email address text box and keep the same forwarding email address. This way, you will always be in the know of your Shopify store life.
Sending emails to customers
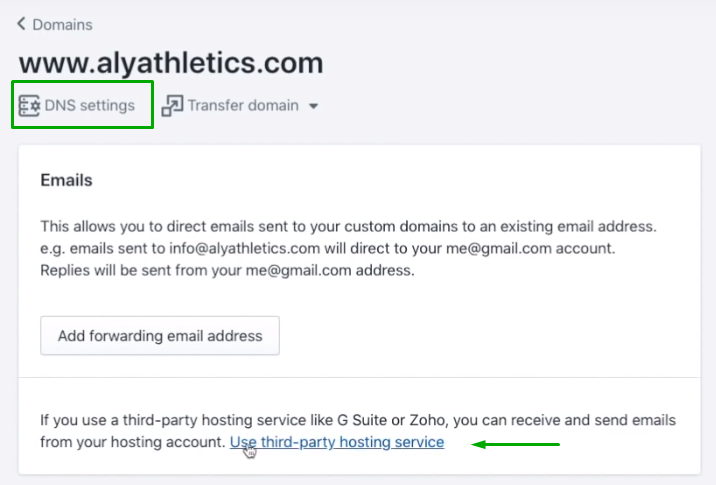
Unfortunately, you can’t reply directly to your customers from your Shopify email address as there is no email hosting service on Shopify. However, you can connect Shopify to a third-party tool, like G Suite, to get the needed functionality. Let’s look at how to do this in a few clicks.
- Sign up with an email hosting service provider (for an easier integration with Shopify, choose G Suite or Zoho Mail).
- Copy the DNS setup instructions of your email hosting provider.
- Open the Domains tab in the Online Store menu.
- Choose your domain in the Shopify-managed domains.
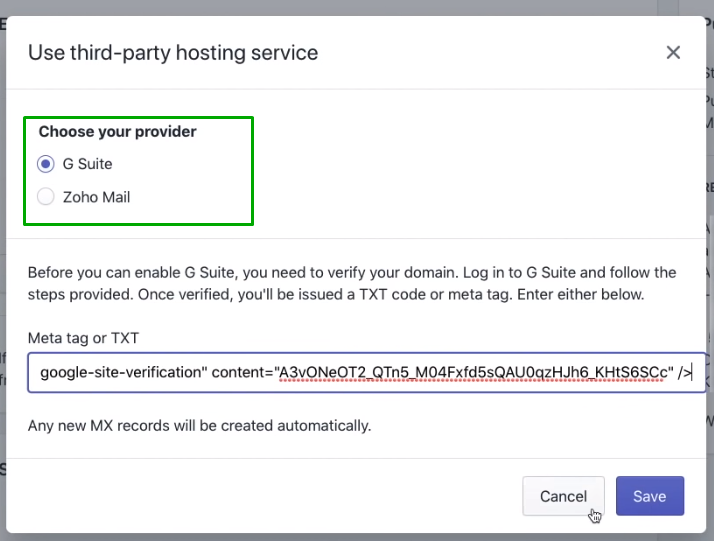
- In the menu, pick G Suite or Zoho mail and insert either the meta tag for G Suite or the Zoho code for the latter option.
- If you prefer an email hosting provider other than G Suite or Zoho Mail, open the DNS settings of your domain to configure it manually.
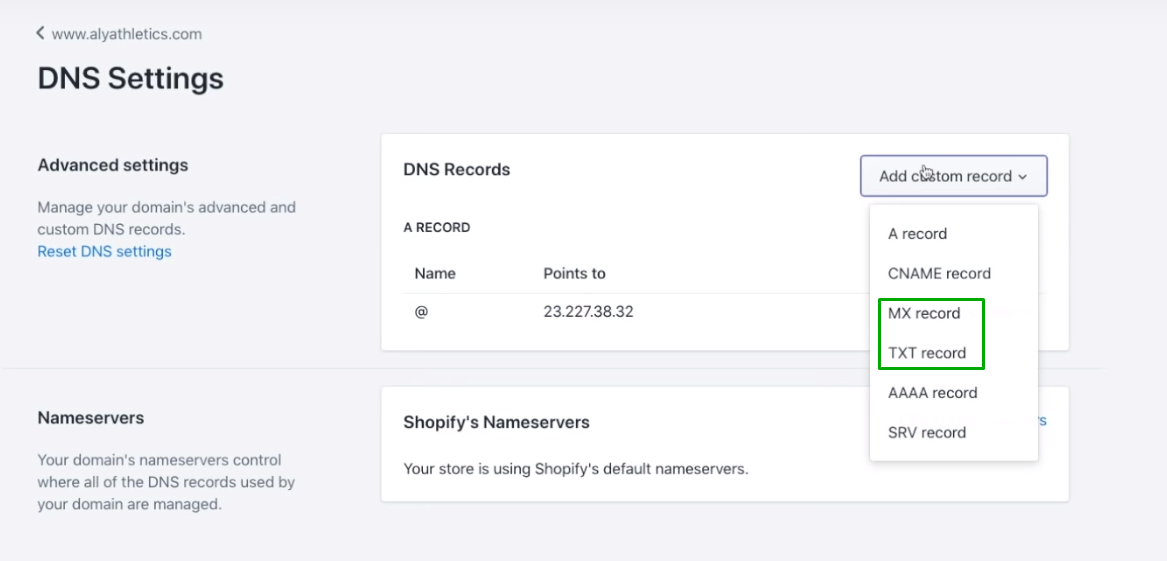
- Now, choose either the MX or TXT record in the Add custom record menu. Then type in the info that you copied from the DNS setup instructions (see step 2).
- That’s it with Shopify configurations. Now go back to your email hosting provider to verify the connection with your Shopify domain. Follow the guidelines of the email hosting provider and voilà.
If you have successfully finished the steps above, you can reply to customers using the store domain email.
Email forwarding with third-party store domains
The case is getting much harder if you haven’t transferred your custom domain to Shopify. This means all configurations require collaboration with the domain provider.
Though it is impossible to write unified steps for every domain provider, we can suggest some general guidelines to help you deal with the settings faster.
- Sign in with your domain account.
- Locate the Create a Forwarding Address or similar option.
- Add your virtual address and type in your private email address for forwarding. The menu often looks similar to the one in Shopify.
- Connect your email address and update MX records if needed. Alternatively, you can sign up with an email hosting provider and connect it to your third-party domain.
That’s it. If you have trouble with configuring your Shopify email forwarding or other functionality, TenGrowth experts are here to help you. Don’t hesitate to drop us a line!